Edge Paint vs Burnishing: Which Leather Edge Finish Should You Use?
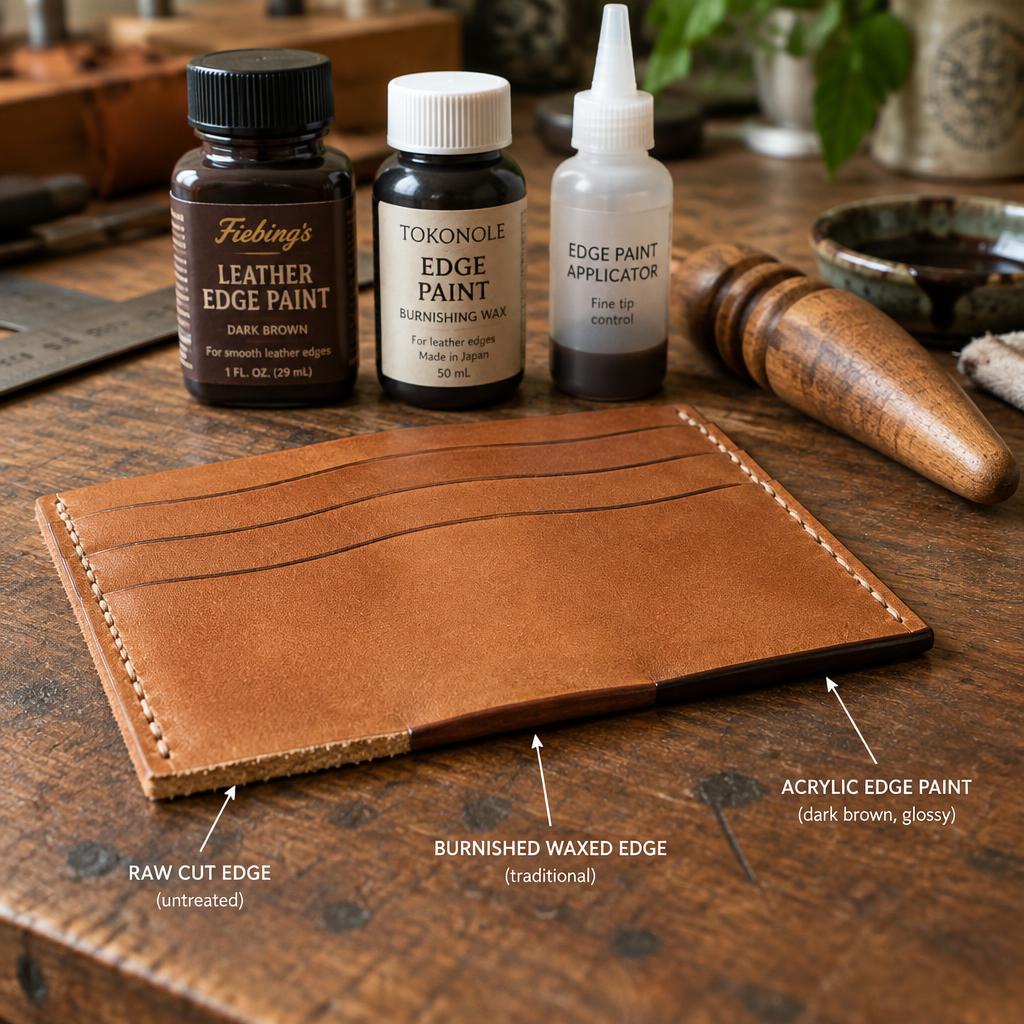
Every leather project ends at the edge, and the edge is where buyers judge quality first. You have two real options: burnishing, which compresses the fibres with moisture, friction and wax, or edge paint, which coats the edge in layers of flexible acrylic. They are not interchangeable — pick the wrong one and the finish cracks, peels or looks fuzzy within weeks.
Edge paint vs burnishing at a glance
| Burnishing | Acrylic edge paint | |
|---|---|---|
| How it works | Compresses and glues the fibres with moisture, friction and wax | Builds a flexible acrylic coating in layers |
| Best leather | Veg-tan, 1.8 mm and up | Chrome-tan, thin leather, lined goods |
| Look | Natural, matte to satin | Uniform, can be glossy |
| Durability | Excellent on thick veg-tan; weak on soft chrome-tan | Excellent if applied in thin layers |
| Failure mode | Fibres fuzz up, edge darkens unevenly | Peels if applied thick or on unprepped edge |
| Time per edge | 5–10 minutes, immediate | 30–60 minutes with drying between coats |
| Cost to start | Slicker, gum tragacanth or water, beeswax | Edge paint, applicator or roller, edge dye |
When burnishing wins
- Vegetable-tanned leather 1.8 mm or thicker — belts, straps, veg-tan bag handles. The dense fibres compress into a glass-hard edge that will outlast paint.
- Natural, uncoloured looks — nothing matches a hand-burnished edge on natural veg-tan.
- Edges that get handled constantly — no coating to wear through; the edge is the leather itself.
- Quick single-piece work — a belt or strap edge takes minutes, no drying waits.
The full burnishing process, including the glass-slicker final pass, is in our edge burnishing guide.
When edge paint wins
- Chrome-tanned and garment leather — soft, loose fibres that burnishing cannot compact. Paint is the only finish that holds.
- Thin panels under 1.5 mm — card slots, wallets, linings. There is not enough cross-section to burnish.
- Lined bags and multi-layer stacks — paint bridges the seam between leather and lining cleanly.
- Colour matching — paint gives an exact match to the leather or a deliberate contrast, which is a current design trend.
How to apply edge paint properly
- Sand the edge with 400–600 grit to remove cutting marks and fibres. Paint magnifies every flaw underneath it.
- Colour the edge first with matching edge dye or the leather's dye, so any wear later never shows white.
- Apply thin coats with a fine applicator or roller — three to five thin coats, not one thick one. Thick coats crack at fold points.
- Sand lightly between coats (600 grit or a fine abrasive pad) once fully dry — typically 15–20 minutes per coat.
- Finish with a final thin seal coat and let cure 24 hours before the piece ships or folds.
How to burnish properly
- Trim and sand the edge flat — an uneven edge never burnishes evenly.
- Apply gum tragacanth, water or an edge dressing; work it in with your finger.
- Rub hard with a wooden slicker until heat builds and the edge darkens and hardens.
- Finish with a light beeswax pass and a final fast slicker friction for shine.
On anything thinner than 1.5 mm, expect fuzzing no matter how well you burnish — that is the leather, not your technique. If the stack is thin, skive the layers first as shown in our skiving guide, or switch to paint.
Hybrid: burnish, then paint
On medium-weight chrome-tan (1.5–2 mm), many makers burnish first to compact the fibres, then apply a single sealing coat of edge paint on top. The compressed base makes the paint last far longer than paint on a raw fuzzy edge. This two-step finish is common on quality bag straps.
Common mistakes
| Symptom | Cause | Fix |
|---|---|---|
| Paint peels in strips | Thick coats, unprepped or oily edge | Sand first; 3+ thin coats instead of 1 |
| Paint cracks at folds | Wrong paint or no flex additive | Use a flexible edge paint, not craft acrylic |
| Burnished edge fuzzes after a week | Chrome-tan or leather under 1.5 mm | Switch to edge paint |
| Burnished edge two-tone / blotchy | Uneven moisture | Damp the whole edge, slicker continuously |
| Paint bleeds onto the grain | No masking, overloaded applicator | Mask 1 mm off the edge; less paint per pass |
Cost and tools compared
| Item | Burnishing kit | Edge paint kit |
|---|---|---|
| Core tools | Wooden slicker, canvas cloth | Applicator bottle or mini roller |
| Consumables | Gum tragacanth, beeswax | Edge paint, edge dye, 400/600 grit |
| Entry cost | $10–20 | $15–30 |
| Refill pace | Slow — dressings last months | Paint consumption adds up on bag production |
Supplies from any major craft retailer — for example Tandy Leather — carry both systems, so you can test each on offcuts before committing.
FAQ
Can I use regular acrylic paint on leather edges?
No. Craft acrylics lack the flexibility additives of leather edge paint and crack as the edge flexes. Dedicated edge paints stay flexible when cured.
How long does edge paint take to fully cure?
Dry to the touch in 15–30 minutes per coat, but full cure — the point where it stops marking — takes about 24 hours. Fold or ship after that.
Can I burnish an edge that already has paint on it?
Not effectively. Remove the paint with sanding first, or you will just heat and smear the coating.
Which finish lasts longer on belts?
Burnishing on veg-tan belts outlasts any paint — the edge is compressed leather, not a coating. On split or chrome-tan belts, use edge paint.
Conclusion
Match the finish to the leather, not to your mood: burnish thick veg-tan, paint thin or soft leathers, and combine the two on medium weights. More finishing technique in Leathercraft Guides & Tutorials.
Enjoyed this guide?
Browse more in Leathercraft Guides & Tutorials or share this article with another leather maker who'd find it useful.


