How to Make a Leather Valet Tray: A No-Sew Snap-Corner Pattern
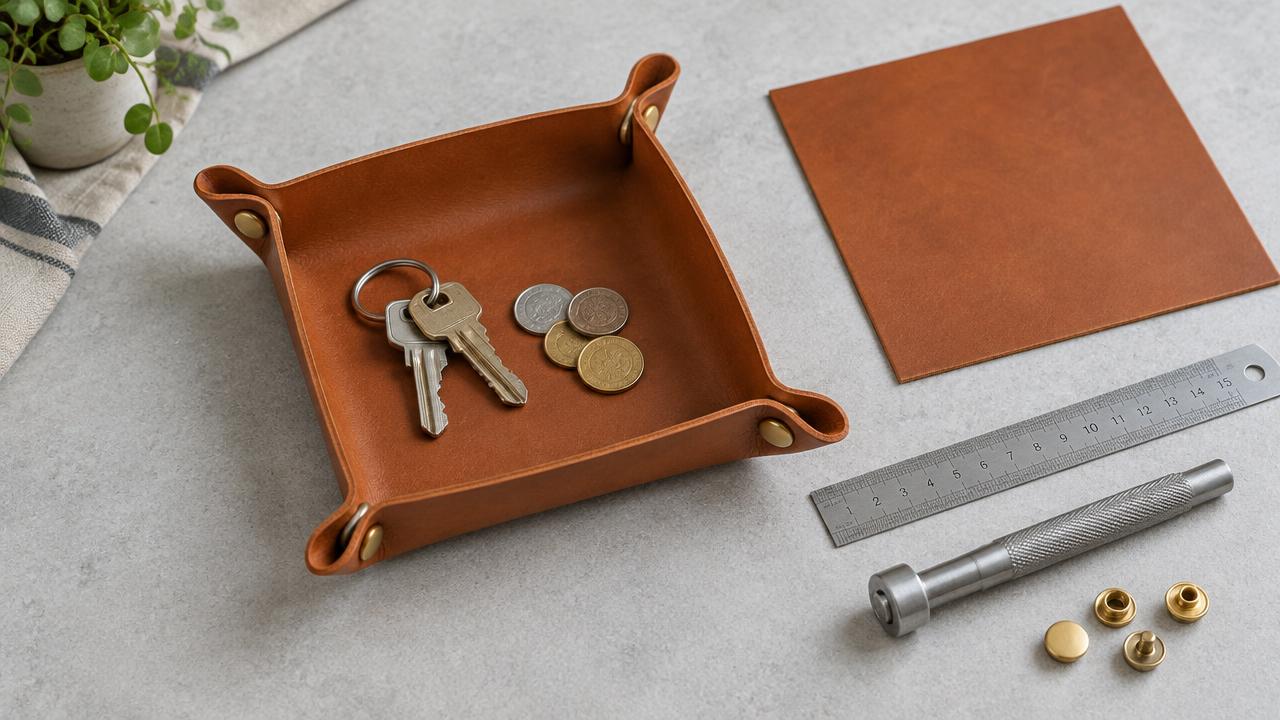
A snap-corner leather valet tray starts as a flat square: pinch each corner, fasten the two adjoining sides with a snap, and the edges rise into shallow walls. It makes a useful catchall for keys or small hardware and can open flat again. This beginner version needs no stitching and no wet molding.
The pattern is an original starting layout to test on paper and scrap. The illustration shows the intended style, not a tested product. In particular, snap positions must be adjusted for your leather thickness and the corner shape you prefer.
Pick leather that holds a shallow wall
Firm vegetable-tanned leather around 1.8–2.4 mm thick is a practical starting choice. Very soft upholstery leather can slump, while very thick leather creates bulky pinched corners and may exceed your snap's post range. Check the specification for the actual leather rather than assuming the tanning method alone determines firmness.
| Material | Expected behaviour | Adjustment |
|---|---|---|
| Firm vegetable-tanned leather | Usually holds a defined wall | Test the fold without creasing the grain excessively |
| Soft bag leather | May sag between corners | Use a bonded backing or choose a firmer offcut |
| Thick belt leather | Stiff, bulky corner folds | Check snap grip length; avoid aggressive folding |
You also need four complete snap sets, their matching setter and anvil, a punch, ruler, cutting mat and knife. A snap set includes mating parts for both sides of the closure; four caps alone are not enough.
Make a paper pattern before cutting
For a desk-size starting tray, draw a 220 × 220 mm square. Mark a fold guideline 35 mm inside each edge. The central 150 × 150 mm square approximates the usable base; the finished base and height vary with corner pinching and leather springback.
| Starting size | Square blank | Wall guideline | Approximate central area |
|---|---|---|---|
| Small hardware tray | 180 × 180 mm | 30 mm from edge | 120 × 120 mm |
| Desk catchall | 220 × 220 mm | 35 mm from edge | 150 × 150 mm |
| Larger entryway tray | 260 × 260 mm | 40 mm from edge | 180 × 180 mm |
Pinch the paper diagonally at each corner so the two neighbouring walls meet. On the two overlapping faces of that pinch, mark a paired fastener position where the surfaces lie flat together. Keep each centre comfortably clear of cut edges and leave room for the entire snap flange. Unfold the pattern: each corner now has two related hole marks, not one hole at the tip.
Build the snap-corner tray
- Cut and inspect. Transfer the outline to leather, cut the square and round the tips slightly. Avoid thin, scarred or loose areas at the snap positions.
- Finish the perimeter. Smooth cut edges before fitting hardware. For firm vegetable-tanned leather, follow our burnishing guide; for soft or coated leather, compare edge paint and burnishing.
- Test one corner in scrap. Replicate the fold using the same leather. Check that the two snap halves meet squarely and that the grain is not cracking at the fold. Reposition the marks if the surfaces meet at an angle.
- Punch only after alignment. Transfer the tested centres to the main blank. Use the punch diameter specified for the snap posts; an oversized hole weakens the attachment. Consult our hardware hole size guide.
- Set the mating parts. Support the cap in its matching anvil and use the setter specified for that snap system. Install one mating half on each face of the pinched corner. Check orientation before striking: the parts must face each other when folded.
- Close and adjust. Snap one corner at a time. Check that all four walls sit evenly, then gently open the corners and inspect the posts for loose or tilted settings.
Do not substitute a random setting punch because it looks similar. Manufacturer systems differ. Our Line 20 snap tutorial is useful when that is the exact type you have selected.
Snap corners versus stitched or molded trays
| Construction | Advantage | Trade-off |
|---|---|---|
| Snap corners | Opens flat for storage | Visible hardware; alignment matters |
| Stitched corners | No snap to open accidentally | Permanent shape and extra sewing |
| Wet-molded tray | Continuous shaped walls | Requires suitable leather, a form and drying time |
These are different patterns, not interchangeable finishing steps. Do not soak a finished snap tray to force a molded shape, especially with dyed leather or unknown hardware finishes.
Troubleshooting
- A corner twists: the holes were marked before the two faces were aligned. Use a scrap test to revise the next pattern; do not stretch the snap into place.
- A snap spins or pulls out: the post may be too short, too long, incorrectly set or sitting in an oversized hole. Replace it with a properly matched set rather than hammering harder.
- The walls slump: the leather is too soft for the chosen span. Reduce the blank size or use a firmer material.
- The grain cracks: stop folding sharply. A decorative finish cannot restore damaged fibres.
Frequently asked questions
Does a no-sew tray need glue?
Not for the single-layer design. Glue becomes relevant only if you add a backing; use a compatible leather adhesive and allow it to cure before setting snaps.
Can I use rivets instead of snaps?
Yes, with a revised corner layout and a matched grip length, but the tray will not open flat. Compare permanent and removable fasteners before changing the design.
Will metal keys mark the leather?
They can. Keep the tray dry and use it where scuffs are acceptable. Avoid assuming a surface coating makes it scratchproof.
Further reading
For a different, shaped construction, see Weaver’s wet-molding tutorial. Wet molding requires a suitable form and leather; it is not necessary for this snap-corner pattern.
Use the offcuts
Save the scraps for snap-setting tests or a leather key fob. Find more small builds in Leathercraft Guides & Tutorials.
Printable project checklist
How to Make a Leather Valet Tray: A No-Sew Snap-Corner Pattern
Materials and tools checklist
Step-by-step checklist
The pattern is a starting layout: test snap positions for your leather. Four caps alone are not four complete snap sets. No stitching, glue or wet molding is required for this single-layer version.
Enjoyed this guide?
Browse more in Leathercraft Guides & Tutorials or share this article with another leather maker who'd find it useful.


