How to Make a Leather Passport Wallet: Pattern, Card Slots and Snap Closure
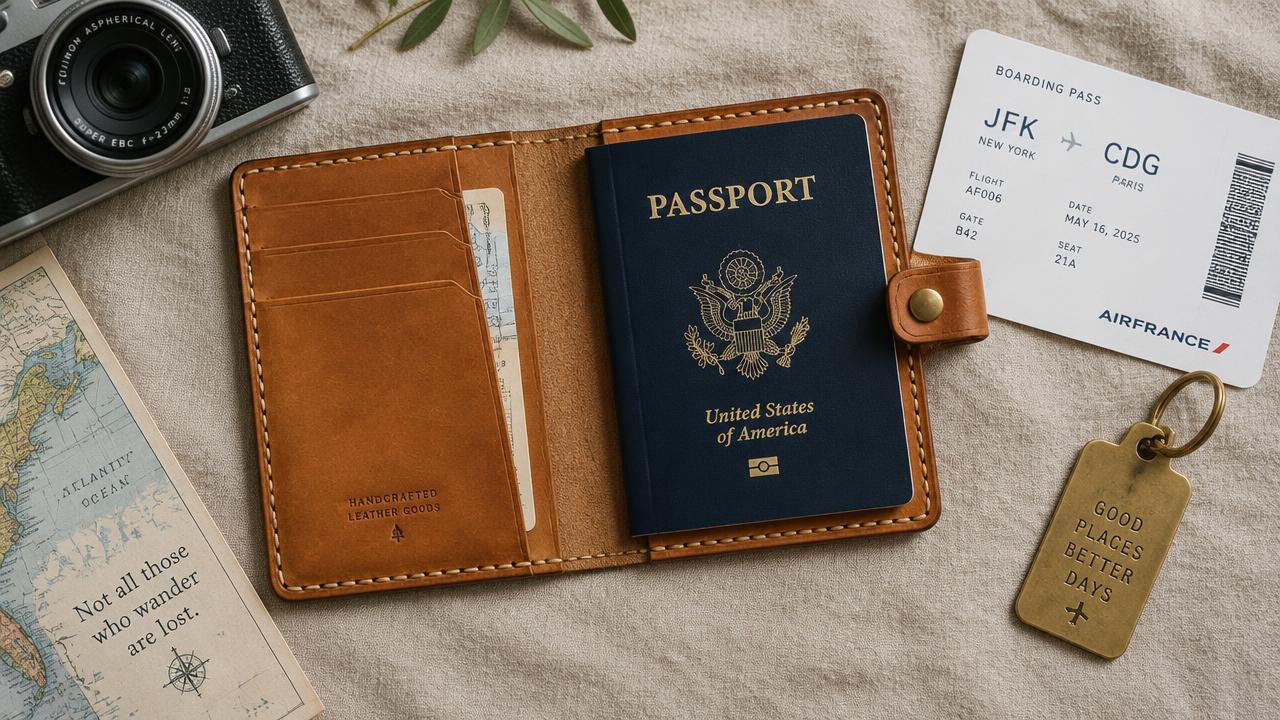
A passport wallet is the project that bridges micro-projects and full wallets: real slot construction, real assembly order, and a closure — but at a forgiving size where small errors disappear. This guide gives the complete pattern, the slot stacking order that avoids the classic bulk problem, and every hardware decision explained.
Design decisions before you cut
| Decision | Option A | Option B | Verdict |
|---|---|---|---|
| Closure | Line 20 snap | Elastic band | Snap — survives airport security trays and years of flexing; the setting method is in the snap guide |
| Closure alternative | Magnetic snap | Turn lock | Magnetic works but adds thickness; the trade-offs are in magnetic closures vs turn locks |
| Construction | Saddle stitch | Contact cement only | Stitch every structural seam; glue alone delaminates with wallet flex |
| Leather | 2.0 mm outer | 1.2 mm throughout | 2.0 mm outer, 0.8 mm interior — the bulk rule below |
The pattern
All dimensions in millimetres, seam allowance 3 mm included in the cut sizes:
| Piece | Cut size | Thickness |
|---|---|---|
| Outer cover | 210 x 145 (folded ≈ 140 x 145) | 2.0 mm (5 oz) veg-tan |
| Passport pocket | 145 x 130 | 0.8 mm |
| Card slot panel | 200 x 60 (three slots 25 mm tall) | 0.8 mm |
| Slip pocket (boarding pass) | 140 x 90 | 0.8 mm |
| Snap reinforcement disc | Ø 18 mm | 1.5 mm |
Check your own passport against these numbers first — cover thicknesses vary by country, and a 5 mm difference in the pocket width is the difference between a snug fit and a passport that falls out at the counter.
Tools and materials
- Leather per the pattern, plus scrap for the reinforcement disc
- One Line 20 snap (solid brass)
- Straight stitching chisels (4 mm spacing), two harness needles, 0.6 mm waxed polyester thread — sizing in the thread guide
- Contact cement — selection in the leather glue comparison
- Edge beveler, gum tragacanth, slicker, edge dye
- Rotary punch, wing divider, steel ruler, skiving knife
Step 1 — Cut and skive
Cut all five pieces. Skive the outer cover's fold spine to about 1 mm across a 20 mm band — without this, the folded cover never closes flat. Skiving thin interior pieces is optional; the technique and knife angles are in the skiving guide.
Step 2 — Build the interior stack
The bulk rule: never let three layers of structural leather meet in one stitched seam. Assemble in this order:
- Cement the card slot panel to the right interior face, slots facing up. Stitch only its two vertical ends.
- Cement the passport pocket to the left interior face, opening upward. Stitch the two sides and bottom — this pocket takes the most handling, so it gets the full three-sided stitch from the saddle stitch tutorial.
- Cement the slip pocket along the bottom edge inside the cover, above the fold line. Stitch its bottom only.
Step 3 — Close the cover
Fold the cover and stitch around the perimeter: punch the stitch line 3 mm from the edge with the chisels, and saddle-stitch from the spine around the top, bottom and open edge. Stitch the fold spine last with a single running line — it locks the fold without adding bulk. Trim the seam allowance flush and burnish every edge to glass; the full process is in the edge burnishing guide.
Step 4 — Set the snap
- Close the wallet and mark where the flap meets the front panel — this point is your alignment reference.
- Punch a 2 mm hole in the flap; set the female socket. Cement the reinforcement disc behind the matching point on the front panel, punch through both, and set the male stud.
- The backing disc is what stops the snap tearing out of a flexing wallet — the same principle as magnetic snap installation. Test-snap ten times.
Step 5 — Finish
Bevel and burnish the flap edges, edge-dye to match, and rub the whole wallet with neutral balm. Optional: monogram the cover before assembly — a two-letter stamp set is much easier to position on flat leather, and it is the detail that makes a homemade gift read as bespoke.
Beginner mistakes and fixes
| Problem | Cause | Fix |
|---|---|---|
| Wallet will not close flat | Skipped spine skiving or too many interior layers at the fold | Skive the spine; keep the bulk rule — three structural layers never meet |
| Cards sit too deep to grab | Slots cut taller than 25 mm | Slot height 25 mm shows the card top by 8–10 mm |
| Stitch line drifts near corners | Freehand chisel placement | Score the stitch line with a wing divider before every punch pass |
| Snap rips out of the flap | No backing disc | Re-set with the 1.5 mm reinforcement disc behind the prongs |
| Passport pocket sags | Pocket bottom left unstitched | Stitch all three loaded sides of the passport pocket |
FAQ
Can I add a zipper pocket for coins?
Yes — the welt and patch methods from the zipper pocket guide scale down to wallet size, and the hand-sewing technique for the zipper itself is in sewing a zipper into leather by hand. Just keep the coin pocket on the outer half so the spine stays thin.
What zipper size would fit if I add one?
A #3 coil — the smallest in the standard range, explained in the zipper size guide. Anything heavier adds bulk a wallet cannot hide.
Is this a good gift project?
It is the best one in the craft: two evenings of work, roughly fifteen euros of material, and a finished object that reads as a shop purchase. Pair it with the leather luggage tag for a matching travel set — same leather, same brass, one afternoon each.
How do I stop the interior slots stretching?
Use 0.8 mm chrome-free interior leather and stitch the slot panel ends through both the panel and the cover, not just the panel. Slots stitched to a single layer stretch with use; slots stitched through the structure hold their opening for a decade.
Conclusion
Skive the spine, respect the bulk rule, stitch the passport pocket on three sides, and back the snap with a reinforcement disc — those four details are the whole difference between a homemade wallet and a handmade one. For the travel set, add the luggage tag and the TSA lock guide, or browse all builds in Leathercraft Guides & Tutorials.
Enjoyed this guide?
Browse more in Leathercraft Guides & Tutorials or share this article with another leather maker who'd find it useful.


