How to Make a Leather Cuff Bracelet: Sizing, Closures and Three Styles
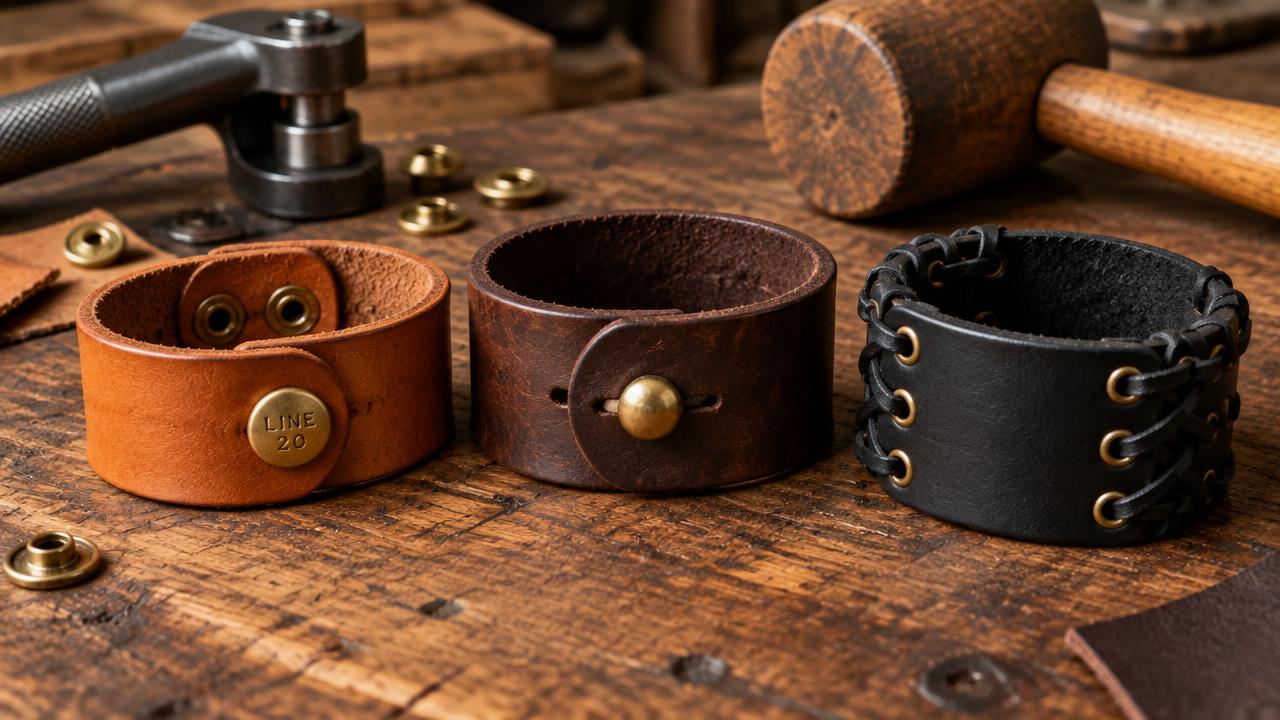
The leather cuff bracelet is the perfect gift-scale project: one strip of leather, one piece of hardware, and two hours of work that look like a boutique purchase. This guide covers the sizing chart, the three classic closures — snap, button stud and laced — and the edge work that separates a handmade cuff from a cut strip.
Which closure should you choose?
| Line 20 snap | Button stud | Laced eyelets | |
|---|---|---|---|
| Look | Clean, invisible from the front | Visible brass accent, jewellery-like | Decorative, bohemian |
| Tools needed | Snap setter, mallet | Two-hole punch, screwdriver | Eyelet die, lace |
| Adjustability | None — one fixed position | 2–3 positions | Infinitely adjustable |
| Best for | Clean minimalist cuffs | Gift cuffs with a feature detail | Wide statement cuffs |
| Failure mode | Can pop open under snag | Stud can unscrew over time | Lace wears first — replaceable |
For a first build, the button stud is the most forgiving: it needs no setting tools beyond a punch. The snap is the classic, and setting it by hand is easier than it looks — the full sequence is in installing Line 20 snaps without a press, and the choice between snap families is explained in spring snaps vs Line snaps.
Sizing the cuff
| Wrist circumference | Strap cut length | Finished length | Overlap for hardware |
|---|---|---|---|
| 14–15 cm (S) | 21 cm | 17.5 cm | 3.5 cm |
| 15.5–17 cm (M) | 23 cm | 19.5 cm | 3.5 cm |
| 17.5–19 cm (L) | 25 cm | 21.5 cm | 3.5 cm |
| 19.5–21 cm (XL) | 27 cm | 23.5 cm | 3.5 cm |
Measure the wrist snug with a tape, not loose. Width is a style choice: 20 mm suits most wrists, 30 mm reads as a statement piece, and anything over 35 mm stops conforming to the wrist curve unless you wet-mould it.
Cutting list (one cuff)
| Piece | Size | Thickness |
|---|---|---|
| Cuff body | Per sizing chart, ends squared or angled | 2.0–2.5 mm (5–6 oz) veg-tan |
| Lining (optional) | Same length, 4 mm narrower | 0.8–1.0 mm goat or pigskin |
| Lace (laced style) | 60 cm of 2 mm round cord | — |
Step 1 — Cut, taper, bevel
Cut the strip, then taper the closure end so it threads easily. Bevel both faces of both long edges and burnish — on a cuff, the edges are the entire finish, so take them to glass with the process in the edge burnishing guide. For colour instead of shine, edge paint applies beautifully on narrow strips; the two approaches are compared in edge paint vs burnishing.
Step 2A — Snap closure
- Wrap the cuff around the wrist and mark where the two ends meet with 5 mm of overlap.
- Punch a 2 mm hole through both ends at the mark — hole-to-hardware matching is in the punch size chart.
- Set the female socket in the overlapping end and the male stud in the other — the mallet-and-setter sequence is in the Line 20 guide linked above. Test-snap ten times; a correct set clicks firmly and holds when tugged.
Step 2B — Button stud closure
- Punch a 4 mm hole in the closure end and a slit or keyhole in the other.
- Insert the stud's screw post from the back through the 4 mm hole and thread the button on from the front.
- Add a drop of thread locker on the post — a cuff flexes constantly and an unsecured stud will slowly unscrew.
Step 2C — Laced closure
- Punch four 5 mm eyelet holes in a row, 12 mm apart, at each end of the cuff.
- Set eyelets if using thin leather — the technique and cracking mistakes are in the eyelet and grommet guide; at 2 mm thickness, raw punched holes also hold.
- Lace the two ends together with a simple criss-cross through the facing holes, knotting the tails under the wrist side.
Step 3 — Dye and finish
Dye the strip before hardware goes on, working in thin coats and sealing once dry — the full process is in the dyeing and finishing guide. Finish with a light balm; cuffs pick up skin oils fast, which deepens the patina naturally.
FAQ
What leather is best for a cuff?
Vegetable-tanned shoulder at 2–2.5 mm — it holds its shape as a cuff instead of flopping like garment leather. Chrome-tanned strap bends work if you want more drape, but they will not keep a cuff form.
My snap keeps pulling out of the leather. Why?
The prongs are set into leather that is too thin or too soft for the snap's grip. Add a small backing washer behind the prongs, or move up to thicker stock — the troubleshooting section of the snap setting guide covers both fixes.
Can I sell these?
Absolutely — cuffs are the classic first product for market stalls: low material cost, fifteen minutes of edge work after the first few, and the hardware cost is under a euro. Just make sure your snaps are solid brass or nickel-free if you market to sensitive skin.
How do I stop the cuff stretching out?
Bond a thin lining to the back with contact cement — choice of adhesive is covered in the leather glue comparison. The lining takes the flex and the outer layer keeps its shape for years.
Conclusion
Measure the wrist snug, take the edges to glass, and set one honest piece of hardware — that is a cuff people will ask where you bought. When you want the next micro-project for the leftover strip, build the braided leather lanyard or the key fob, or browse all builds in Leathercraft Guides & Tutorials.
Enjoyed this guide?
Browse more in Leathercraft Guides & Tutorials or share this article with another leather maker who'd find it useful.


