How to Line a Leather Bag: Materials, Order of Assembly and Mistakes
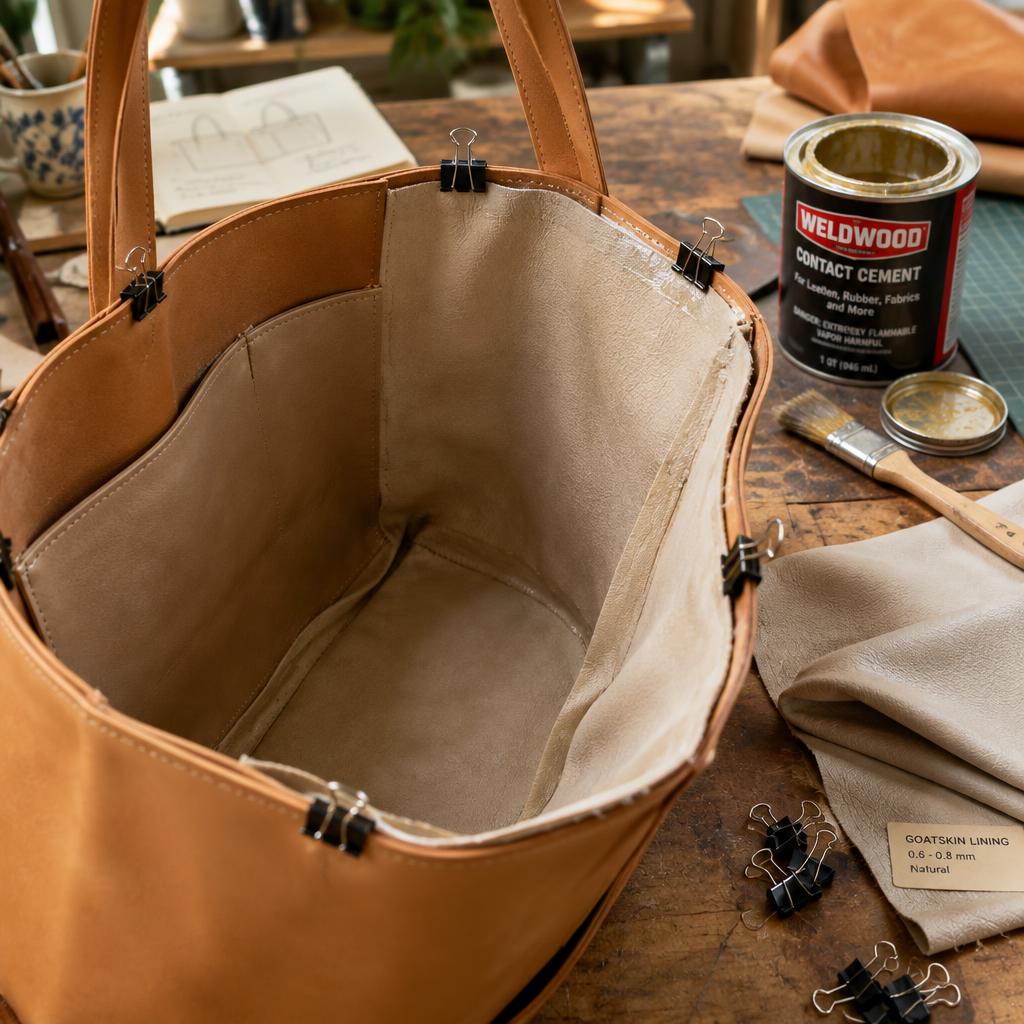
A lining does three jobs: hides construction, adds structure, and protects the interior contents. But in leatherwork the lining is also a structural layer — installed in the wrong order, it locks you out of the hardware you still need to reach, and forces you to stitch through layers you should never pierce. Get the sequence right and the rest is patience.
Choosing the lining material
| Material | Weight | Best for | Notes |
|---|---|---|---|
| Goatskin leather | 0.4–0.6 mm | Handbags, satchels, premium bags | Durable, ages well; the classic choice |
| Pigskin | 0.3–0.5 mm | Wallets, small leather goods | Strong for its weight, slightly textured |
| Cotton twill / canvas | 6–10 oz | Totes, casual bags | Easy to sew, washes, less structure |
| Suede / pigskin split | 0.5–0.7 mm | Briefcases, structured bags | Grip, body, adds noticeable weight |
| Ripstop nylon | 40–70 g/m² | Backpacks, travel bags | Light, slick, hardest to sew cleanly |
Rule of thumb: lining weight should stay under a third of the shell leather weight. A 1.6 mm shell takes a 0.5 mm lining comfortably; anything heavier fights the seams and turns corners brittle.
The order of assembly (where most builds go wrong)
Line the bag after these steps, in this order:
- All panels cut, skived and edge-dyed on the shell.
- All interior hardware holes cut: slots for magnetic snaps, D-ring anchors, turn lock posts. See our magnetic snap install guide for slot sizing.
- All interior pockets built and attached — a welt zipper pocket, slip pockets, card slots. The zipper pocket tutorial covers both methods.
- Structural seams that pass through the shell only (like a folded base) sewn.
- Then the lining goes in.
- Finally, edge finishing and exterior hardware.
Once the lining is glued and stitched in, reaching the back of a snap or a rivet becomes a demolition job. Anything that needs a washer folded over prongs happens before lining, always.
Gluing the lining in
- Use contact cement on both faces, let it flash off 5–10 minutes, then mate them in one confident pass — contact bonds grab instantly and do not reposition.
- Cement a 10–12 mm border only, not the full panel. A full-coat glue line makes the bag stiff and crackly, and defeats the drape of soft shells.
- Roll or press from the centre outward to push air pockets to the edges.
- Clip curved areas with binder clips over scrap card so the jaws do not mark the leather.
Contact cement choice and safety are compared in our leather glue comparison.
Stitching the lining
- Stitch in the ditch or just inside it — a single line 1–2 mm from the panel edge catches lining and shell together and later disappears under the edge finish.
- Use a lighter thread for the lining line than the structural seams; a heavy thread here visually fights the edge.
- Shorten stitch spacing on curves — 4–5 mm straight runs, 3 mm through corners, so the lining never gapes.
- Do not stitch through the base fold on structured bags — the lining of the base is handled last, as a separate piece.
Handling corners, gussets and the base
- Cut lining gussets narrower than the shell gussets by about 2 mm each side; lining should sit relaxed, never tensioned, or it tears at the stress points.
- Relieve corners with a small notch in the lining seam allowance so the corner stacks flat instead of bulging.
- Line the base separately: a fitted base lining panel glued in after the body lining, its edges caught by the same perimeter stitch line.
- Leave hardware bays open — anywhere an anchor or foot will pass through, cut the lining with a small cross slit, never a big hole. Bag feet installation is covered in our bag feet guide.
Common mistakes
| Symptom | Cause | Fix |
|---|---|---|
| Lining sags and bags after a month | Lining cut to full panel size, no tension | Cut 1–2 mm smaller per side; attach at top edge only where possible |
| Bag will not close flat | Lining caught in the flap or closure seam | Trim lining back from the flap fold line before stitching |
| Bubbles under the lining | Partial flash-off or trapping air | Full flash time; roll from centre outward |
| Lining tears at D-ring anchors | No relief slit, lining under tension | Cross-slit every anchor point, reinforce with a patch |
| Stiff, crackly bag | Full-panel cement coat | Glue a border only |
Key takeaways
- Cut every interior hole and build every interior pocket before lining.
- Lining is glued as a border, not a full coat, and stitched once near the edge.
- Lining runs slightly smaller than the shell — relaxed, never tensioned.
- Base lining goes in last, as its own fitted panel.
FAQ
Can I line a bag after it is fully built?
Partially. A drop-in fabric liner (stitched as a separate sack, then hand-tacked at the rim) works for existing bags, but a glued leather lining needs open access and is a rebuild, not an add-on.
Should the lining match the exterior leather colour?
Matching is the safe classic; a contrasting lining is a deliberate design feature and hides less dirt on pale shells. Avoid dye migration by lining pale shells with undyed or synthetic linings.
What thread and needle for goatskin lining?
A fine polyester thread (around 0.35 mm) and a size 4/5 needle or a fine chisel. Oversized holes in 0.5 mm leather tear into slots quickly — thread sizing is covered in our thread guide.
How do I stop the lining from showing at the top edge?
Tack the lining 2–3 mm below the shell's top edge and let the edge finish cover the line, or fold the shell's top edge over the lining and stitch through both — the folded-edge look on premium totes.
Conclusion
Lining is a sequence problem, not a sewing problem: hardware and pockets first, lining second, edges last. Get that order right and even your first lined bag will look factory-finished. More builds in Leathercraft Guides & Tutorials.
Enjoyed this guide?
Browse more in Leathercraft Guides & Tutorials or share this article with another leather maker who'd find it useful.


