How to Make a Leather Work Apron: Cross-Back Straps, Buckles and Rivets
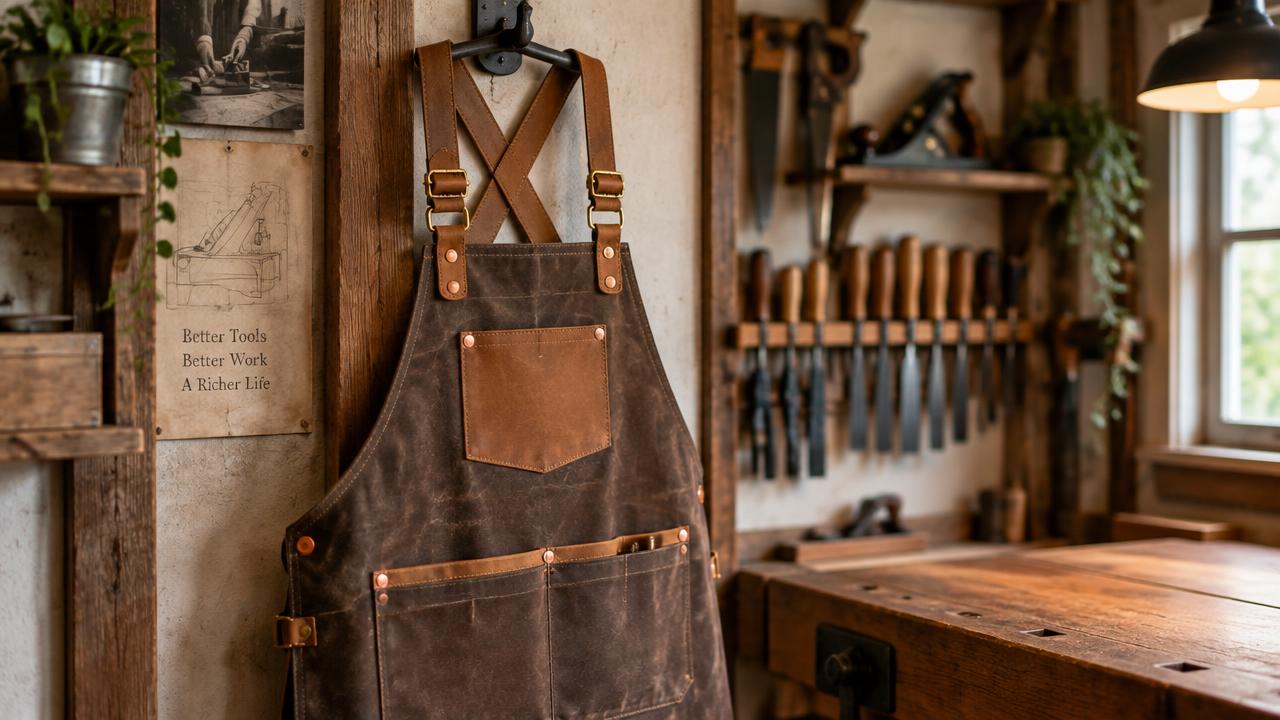
A well-built work apron is the project that teaches strap work, buckle fitting and structural riveting in one build — and unlike a belt, it is big enough that every mistake is visible, which makes it a superb teacher. This guide walks through the cross-back (X-back) design: the sizing chart, the buckle and rivet decisions, and the exact assembly order that keeps the apron hanging square for years.
Why cross-back beats a neck strap
A neck-strap apron hangs the entire load on your neck — the cause of the end-of-day ache every maker knows. The X-back design moves the weight onto the shoulders and upper back through two crossing straps, and it is also self-tensioning: lean forward and the apron stays put instead of swinging. The trade-off is more hardware: two buckles, four to six riveted anchor points, and longer straps. None of it is difficult, but the order of assembly matters.
Sizing the apron
| Wearer height | Bib width | Total length (shoulder to hem) | Strap length each (finished) |
|---|---|---|---|
| 155–165 cm | 24 cm | 85 cm | 95 cm |
| 165–178 cm | 26 cm | 92 cm | 105 cm |
| 178–190 cm | 28 cm | 100 cm | 115 cm |
| 190 cm+ | 30 cm | 108 cm | 125 cm |
Hem the apron 5 cm longer than the table says and fold it up — a turned hem is the cheapest reinforcement you will ever add. The buckle adjustment range absorbs the rest of the fit; pick it with the same logic as in the belt buckle sizing guide, scaled up: the buckle's internal width should match the strap width exactly.
Cutting list
| Piece | Size | Material |
|---|---|---|
| Bib panel | 26 x 30 cm | 2.0–2.5 mm (5–6 oz) veg-tan |
| Body panel | 60 x 55 cm, hem all around | Waxed canvas 12 oz, or 1.5 mm leather |
| Straps ×2 | 110 x 3.5 cm | 2.0–2.5 mm veg-tan |
| Chest pocket | 18 x 16 cm | 2.0 mm veg-tan |
| Lower pockets ×2 | 22 x 20 cm | 2.0 mm veg-tan |
| Anchor tabs ×6 | 6 x 4 cm | 2.0 mm veg-tan |
Choosing the hardware
Buckles: a single-prong roller buckle on each strap is the standard for aprons — the roller lets you cinch one-handed with greasy hands. If you want tool-free, on-the-fly length changes instead of a fixed set-and-forget fit, backpack-style slide buckles are the alternative. Solid brass only; the reasons are in the solid brass buckle guide.
Rivets: copper rivets and burrs are the structural choice for anchor points — they are stronger in shear than any double-cap rivet and look right on a work garment. The full hand-setting sequence is in setting copper rivets by hand. Use double-cap rivets only for purely decorative spots, if at all; the differences are compared in rapid vs double-cap rivets.
Tools and materials
- Leather and canvas per the cutting list
- Two 35 mm solid brass roller buckles with matching tongue width
- Copper rivets #12 with burrs (10–14 pieces)
- Rotary punch — hole sizing per the hole punch size chart
- Contact cement, waxed polyester thread, harness needles — thread choice in the thread guide
- Edge beveler, slicker, edge dye — finishing in the edge burnishing guide
Step 1 — Pattern and cut
- Draft the bib as a rectangle with the two top corners chamfered 4 cm — this is where the straps cross over the shoulder and a sharp corner would press into the collarbone.
- Cut the body panel and fold a 2 cm hem on the top edge and sides; stitch or cement it before anything else attaches.
- Mark the six anchor points: two at the bib top corners, two at the waist sides, two at the lower hem corners.
Step 2 — Straps and buckles
Bevel and burnish both long edges of every strap before assembly — 4.4 metres of edge is most of the work in this project. Cut each strap to length with 12 cm of extra tail for the buckle end. Set the buckle: fold 4 cm of strap through the buckle bar, punch a 3 mm hole, and secure the fold with one copper rivet. The other strap end gets a row of five adjustment holes, punched 3 cm apart with the sizing logic from the buckle sizing guide.
Step 3 — Pockets
Skive the top 1 cm of each pocket edge to halve the thickness of the fold — the technique is in the skiving guide. Cement the pocket in position, then saddle-stitch the sides and bottom; the two-needle stitch is the one that cannot unravel, covered in the saddle stitching tutorial. Leave the top edge open and unstitched — that edge takes the wear and a stitch line there only gives it something to tear along.
Step 4 — Rivet the frame
- Position each strap end over its anchor point with an anchor tab sandwiched behind — three layers total. A strap riveted to a single layer of leather is the number one apron failure; the physics are the same as bag strap anchors in the strap anchor reinforcement guide.
- Punch through all layers with a 3.2 mm punch, set the copper rivet and burr, and peen to a dome that sits just proud of the leather.
- Cross the straps at the back bib corners and rivet the X point through all four layers.
Step 5 — Edges and finish
Burnish the bib's edges, bevel the pocket tops, and rub the whole leather surface with neutral balm. If you want colour, dye the bib before assembly — the process and sealing steps are in the vegetable-tan dyeing guide.
Mistakes that ruin aprons
| Problem | Cause | Fix |
|---|---|---|
| Strap tears out at the rivet | Riveted through a single leather layer | Always add an anchor tab; rivet through three layers minimum |
| Apron hangs twisted | Strap anchor points not mirrored | Mark all six anchors from a centre line before punching any holes |
| Buckle tongue bends | Buckle under-sized for the strap | Match buckle internal width to strap width exactly |
| Bib digs into the collarbone | Top corners left square | Chamfer 4 cm at the shoulder corners |
| Pockets sag open | Pocket attached only at the bottom | Cement and stitch both sides, not just the base |
FAQ
Can I make the whole apron from leather?
Yes, but keep the body at 1.5–2 mm or the apron will weigh over a kilo and become hot to wear. The waxed-canvas body with a leather bib is the professional compromise: it drapes better, weighs half as much, and the leather goes where the structure and looks matter.
How do I clean it?
Brush off dust, wipe with a damp cloth, re-balm twice a year. Never machine-wash leather portions; the canvas alone can be spot-cleaned with cold water and dried flat away from heat.
What rivet size do I need?
#12 copper rivets handle the standard three-layer sandwich (strap + tab + body). Where four layers meet at the X point, use the longer #14 — a rivet that is too short will not peen over and will fail exactly where the load is highest.
Is this a good first big project?
It is the best one after a belt, because it repeats belt skills at a larger scale: straps, a buckle, edge work and rivets. Do the leather belt build first if you have not — the apron is simply a belt with pockets.
Conclusion
Mirror your anchor points, sandwich every strap with a tab, size the buckles to the straps, and burnish every edge before assembly — do those four things and this apron will outlast the workshop you hang it in. For the matching smaller pieces, build the leather key fob, or browse all builds in Leathercraft Guides & Tutorials.
Enjoyed this guide?
Browse more in Leathercraft Guides & Tutorials or share this article with another leather maker who'd find it useful.


