How to Wrap Leather Bag Handles: Cross-Stitch vs Baseball Stitch
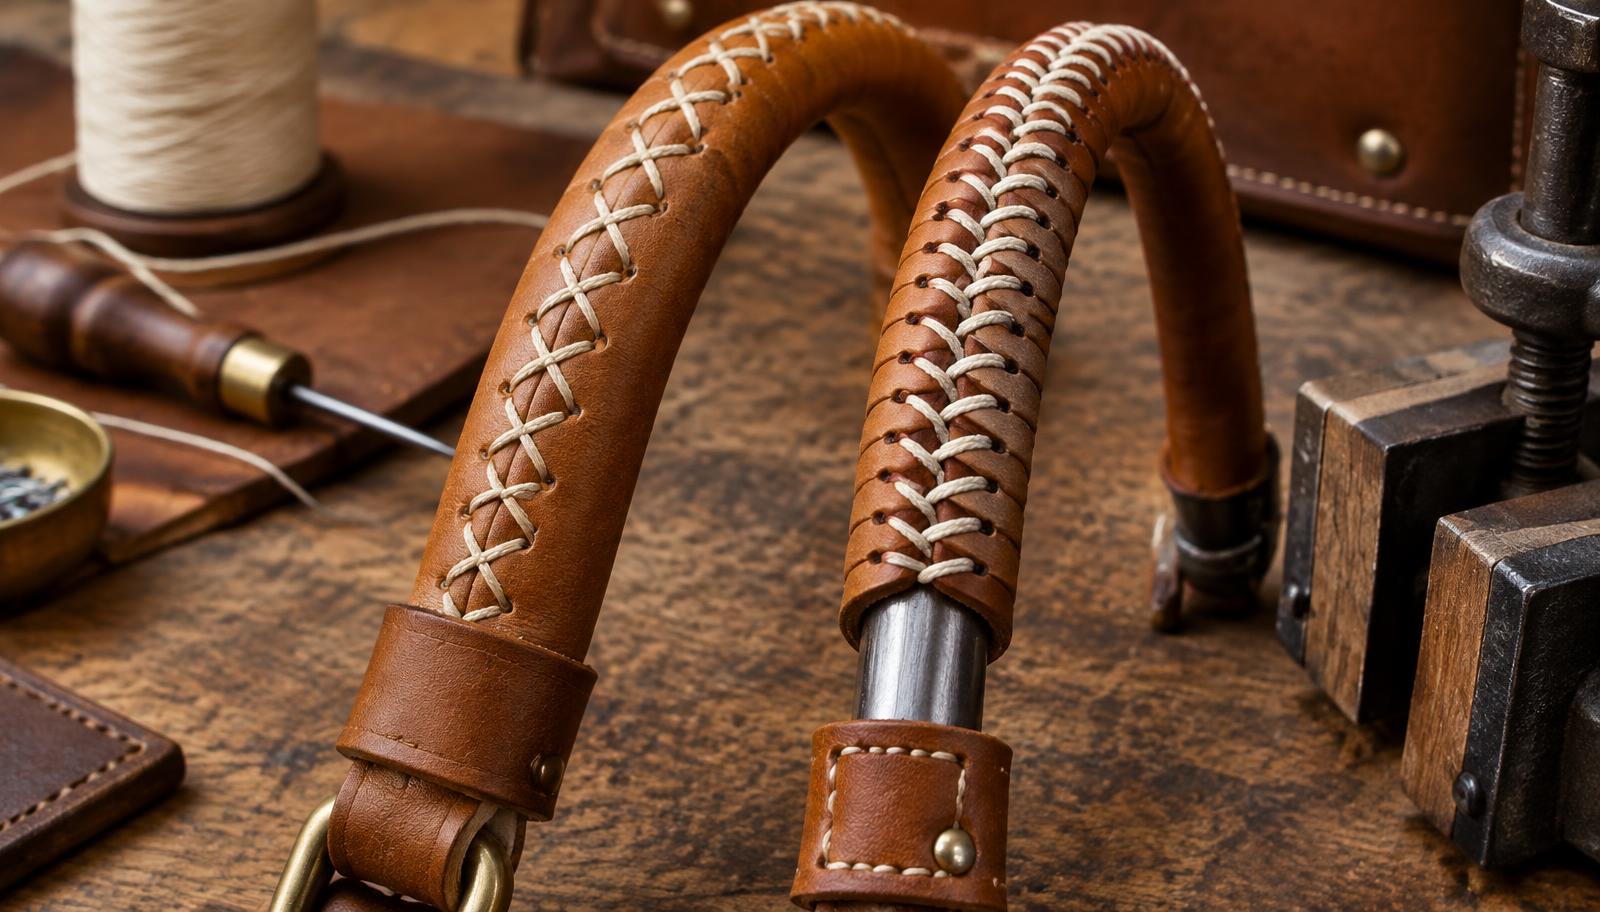
A wrapped handle turns a plain strap into the most photographed part of a bag. The two dominant techniques — cross-stitch (an X pattern over a flat wrap) and baseball stitch (a chevron wrap over a round core) — use the same materials and completely different rhythms. This guide covers both, when to pick each, and the mistakes that make wrapped handles look homemade.
Cross-stitch vs baseball stitch at a glance
| Cross-stitch | Baseball stitch | |
|---|---|---|
| Handle shape | Flat strap, single or double layer | Round or half-round core (rope, cord, rolled leather) |
| Look | Decorative X pattern, symmetrical | Tight chevron, looks like a baseball seam |
| Grip | Smooth, firm | Padded, cushioned |
| Speed | Faster — fewer wraps per cm | Slower — dense coverage |
| Thread used | Less | More (roughly double) |
| Best for | Briefcases, structured totes | Weekender bags, heavy-load handles |
If the handle carries serious weight — a weekender, a tool bag — baseball stitch over a padded core is the right answer. If the bag is structured and the handle is mostly a design feature, cross-stitch gives you the classic look in half the time.
Materials and tools
- Lacing leather: 12–15 mm wide, 1.0–1.2 mm thick veg-tan for cross-stitch; 10–12 mm for baseball stitch. Cut from the same hide so the temper matches — skiving tips in our skiving guide apply when your lacing is too thick at the edges.
- Core: 6 mm cotton rope or a rolled and glued leather core for baseball stitch; a 20–25 mm flat strap for cross-stitch.
- Thread: 0.8–1.0 mm waxed polyester or linen — sizing in the thread guide. Waxed thread grips the wraps and stops the pattern from sliding.
- Two harness needles, sharp knife, cutting mat, ruler, fabric clips or spring clamps, contact cement.
Cross-stitch wrap, step by step
- Prepare the strap: bevel and burnish the strap edges first — you cannot reach them under the wrap. Burnishing basics are in the edge finishing guide.
- Anchor the thread: glue the lacing's start under the handle's end fitting (the anchor plate or rivet line hides the tail). See reinforcing strap anchors if the fitting itself is the weak point.
- Lay the diagonal: wrap the lacing around the strap at roughly 45°, then cross back the other way, so each band of strap gets one stitch of each direction before you move on.
- Keep the pitch constant: each X should sit 6–8 mm from the last. Mark a pencil line along the strap as a pitch guide — eyeballing it is how X patterns drift into a herringbone.
- Tension every wrap: pull each stitch snug before laying the next. Uneven tension shows up as a wave in the pattern that no amount of finishing hides.
- Terminate: tuck the final tail under the opposite end fitting and glue it, or take three back-stitches through the wrap's underside and trim.
Baseball stitch wrap, step by step
- Build the core: wrap cotton rope tightly with tape, or roll leather around itself and glue the seam. The core should be about 25 mm shorter than the finished handle — the leather cover adds the rest.
- Cover the core: wrap a strip of 0.8 mm leather (30–40 mm wide) around the core spirally, gluing as you go. This base layer hides gaps in the stitching below.
- Start the stitch: anchor the lacing at one end fitting, then work a figure-eight pattern around the handle: the lacing crosses on top, wraps under, and emerges on the opposite side slightly advanced. That advancing crossover is what creates the chevron.
- Set the pitch: each chevron should advance 4–5 mm. Baseball stitch eats lacing — budget roughly 3.5 cm of lacing per centimetre of handle and cut one continuous piece. A mid-handle splice is visible forever.
- Finish: tuck the tail under the last two wraps at the end fitting, glue, and clamp overnight before load testing.
Common mistakes
| Problem | Cause | Fix |
|---|---|---|
| Pattern drifts sideways | Pitch measured by eye | Pencil pitch guide lines before starting |
| Wraps loosen after weeks | Unwaxed thread, light tension | Use waxed thread; pull every wrap snug as you go |
| Lacing runs out mid-handle | No length budget | 3.5 cm lacing per 1 cm of handle (baseball); 2 cm per 1 cm (cross) |
| Handle core collapses | Rope core too soft | Wrap the rope with tape, or use rolled leather |
| Ends fray at the fittings | Tails not anchored | Glue tails under the end fittings, clamp overnight |
| Cover twists under load | Spiral base layer glued loose | Glue the base layer edge-to-edge with contact cement |
FAQ
Can I wrap a handle that already has end fittings riveted on?
Yes — that is the normal sequence. Rivet the end fittings to the strap or core first, then wrap between them so the fittings trap the lacing tails. The rivet-setting process is the same one in our copper rivets tutorial.
Which stitch is faster to learn?
Cross-stitch. Its rhythm is a simple repeat and errors are easy to unpick. Baseball stitch fights you for the first 10 cm and then clicks — start with it on a short strap, not the finished handle.
Does a wrapped handle need stitching through the leather?
No — both techniques are purely wrapped; the lacing never pierces the structural strap. That is why they suit straps that are already saddle-stitched at the ends but too thick to sew decoratively.
How do I clean a wrapped handle?
A soft brush along the stitch direction removes dust; condition the exposed leather sparingly so the wrap does not swell and loosen. Never soak it — trapped moisture in the core is what makes wrapped handles sour.
Conclusion
Choose the stitch for the load, mark your pitch, tension every wrap, and budget your lacing before you cut it. Wrapped handles reward patience more than any other part of a bag. For the joinery the handle hangs from, read chain strap connectors, or explore more techniques in Leathercraft Guides & Tutorials.
Enjoyed this guide?
Browse more in Leathercraft Guides & Tutorials or share this article with another leather maker who'd find it useful.


