How to Make a Leather Card Holder: A Beginner Build with a Snap Closure
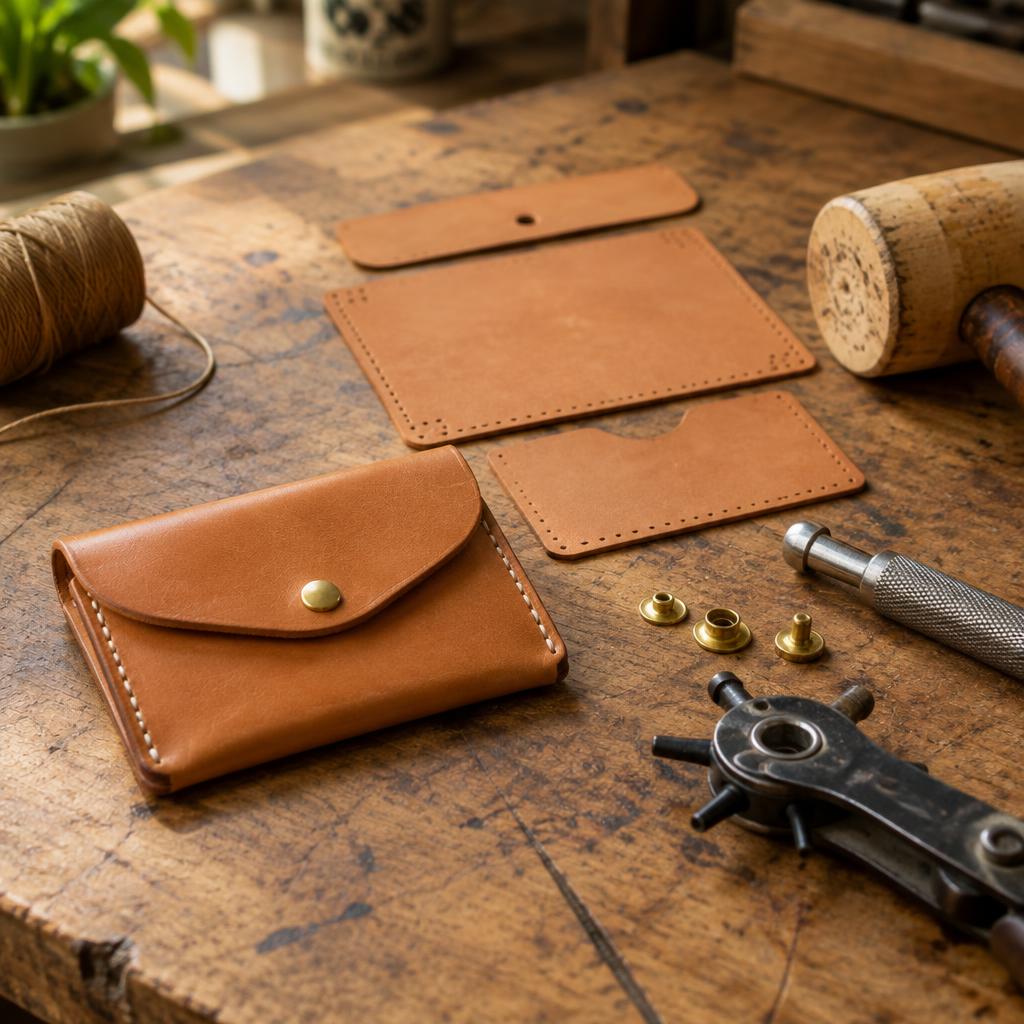
A card holder is the best first project in leathercraft: it uses every core skill — accurate cutting, punch-and-stitch sewing, edge finishing and one piece of hardware — in a build that takes about two hours. This version closes with a Line 20 snap over the flap, so you finish with a piece that actually fastens, not just folds.
Cutting list
For a folded 105 x 75 mm holder that takes 6–8 cards, cut from 1.2–1.4 mm veg-tan (3–4 oz):
| Piece | Size | Qty | Purpose |
|---|---|---|---|
| Body | 105 x 175 mm | 1 | Folds to form the back and main pocket |
| Flap | 105 x 55 mm | 1 | Snaps down over the front |
| Front pocket | 105 x 65 mm | 1 | Quick-access cards, skived at the top |
| Card slot divider | 95 x 40 mm | 1 | Optional interior divider |
Leather thickness matters more than colour here: under 1.2 mm the holder flops, over 1.6 mm the fold stacks too fat for the snap. If you are unsure what you bought, check it against our hardware hole size chart.
Tools and materials
- 1.2–1.4 mm veg-tan hide or panel, about 200 x 200 mm total
- Line 20 snap set (or a magnetic snap — see the magnetic snap tutorial for that variant)
- Rotary punch or drive punch, 1 mm stitching chisels
- Waxed polyester or linen thread, ~0.55 mm — sizing in our thread guide
- Contact cement or double-sided tape, edge dye or edge paint, gum tragacanth, wooden slicker
- Cutting mat, steel ruler, wing divider, scratch awl
Step 1 — Cut and skive
Cut all four pieces square. Skive the fold line on the body to about 60% thickness across a 10 mm band, and skive the top edge of the front pocket the same way. Unskived folds are the reason first holders stand open instead of lying flat.
Step 2 — Mark and punch the stitching
Crease the body fold with a bone folder. Stack the front pocket on the body and mark its side and bottom stitch lines 3 mm in with the wing divider. Set your chisels on the line and punch through both layers together so the holes register — punching the pieces separately is the classic cause of wavy stitch lines.
Step 3 — Stitch the pocket
Saddle stitch the pocket's sides and bottom with two needles, one locking stitch at each end. If this is your first time sewing, follow our saddle stitching tutorial first — the card holder is exactly the practice piece it recommends.
Step 4 — Attach the flap
Glue the flap's bottom edge into the fold with contact cement or tape, clamping the spine line. Stitch across the spine 3 mm from the fold, through body and flap. This is the structural seam: 4 mm spacing, no skipped holes.
Step 5 — Install the snap
- Close the flap where it naturally falls and push an awl through to mark the body — measure from the closed position, never from an edge.
- Punch a 2 mm hole for the screw post (or slots for a prong type) through both flap and body at the mark.
- Set the female half on the flap, the male half on the body, so the flap snaps down smoothly with the cap facing out.
- Test the snap 20 times; if it pulls crooked, the halves are offset more than 1 mm — re-mark rather than fighting it.
The full hand-setting process without a press, including cap orientation and troubleshooting weak snaps, is in our Line 20 hand-setter guide.
Step 6 — Finish the edges
Sand all exposed edges to 400 grit, dye them, then burnish with gum tragacanth and a wooden slicker until hard and glossy. On the flap's curved edge, burnish before installing the snap so the hardware never gets wet or waxy. Full process in the edge burnishing guide.
Troubleshooting
| Problem | Cause | Fix |
|---|---|---|
| Holder stands open | Unskived fold, leather too thick | Skive the fold band; use 1.2–1.4 mm leather |
| Stitch line waves | Holes punched per-piece | Punch through stacked layers together |
| Snap misaligned | Marked from the edge, not the closed flap | Re-mark from the closed position |
| Cards sit too tight | Pocket allowance under 4 mm | Leave 4–5 mm side allowance per card bay |
| Edge fuzzes after a week | No sanding before dyeing | Sand 400 grit, then dye, then burnish |
FAQ
What leather is best for a first card holder?
Vegetable-tanned shoulder or bend at 1.2–1.4 mm. It burnishes beautifully, holds a fold, and forgives beginner stitching. Avoid chrome-tan for a first build — its edges will not burnish.
Can I make it without a stitching chisel?
Yes — mark holes with the wing divider spacing and pierce each one with a diamond awl on the stitch line. It is slower but produces the same lock stitch.
How many cards does this size hold?
The main pocket takes 4–5 cards, the front pocket 2–3. Leather relaxes with use, so build snug — it loosens within a week.
Can I add a second snap or a wrist strap?
Easily. A second snap 12 mm from the first secures wider loads, and a 6 mm rivet with a small D-ring in the top corner accepts a wrist strap — see setting double cap rivets and the key fob project for the strap side.
Conclusion
Cut square, skive the folds, punch through stacks together, and measure hardware from the closed position — those four habits are the whole project. When you are ready for the next build, try the belt in our step-by-step belt tutorial, or browse more in Leathercraft Guides & Tutorials.
Enjoyed this guide?
Browse more in Leathercraft Guides & Tutorials or share this article with another leather maker who'd find it useful.


