How to Make a Leather Camera Strap with Swivel Hooks and Split Rings
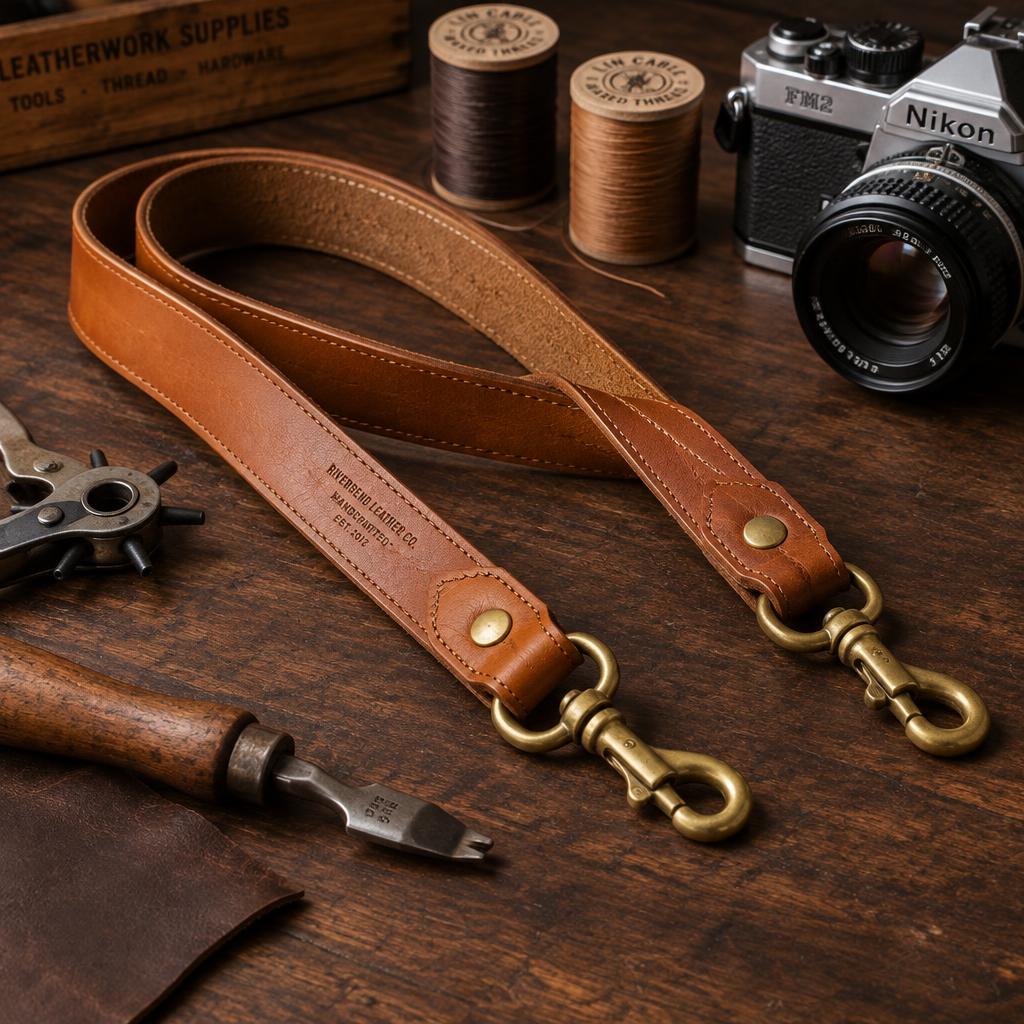
A leather camera strap is the accessory photographers actually notice: it softens with use, carries the camera securely, and looks better after five years than the nylon it replaced. This build uses a saddle-stitched leather strap closed with solid brass swivel snap hooks and split rings — so the strap is quickly removable, and the weak points are all hardware you can inspect. Total build time: one afternoon.
Size the strap first
Camera straps hang from the lugs and loop around the neck or shoulder. Measure how far below your chest the camera sits when you hold it in shooting position, then use the chart. Err long — an adjustable section (Step 6) is cheap insurance.
| Wear style | Finished strap length | Strap width | Leather thickness |
|---|---|---|---|
| Neck strap, compact or mirrorless | 95–105 cm | 15–20 mm | 2.5–3 mm (6–7 oz) |
| Neck strap, full-frame DSLR | 100–115 cm | 20–25 mm | 3–3.5 mm (7–8 oz) |
| Shoulder / crossbody carry | 125–140 cm | 25 mm | 3–3.5 mm (7–8 oz) |
| Wrist strap | 20–24 cm loop | 12–15 mm | 2.5 mm (6 oz) |
Use vegetable-tanned or bridle leather. Chrome-tan stretches under a heavy body and the strap ends fuzz where the hardware works back and forth.
Choose the attachment hardware
Three ways to connect a strap to a camera, ranked by practicality:
| Method | Pros | Cons |
|---|---|---|
| Swivel snap hook + split ring | Strap swaps between cameras in seconds; hook rotates so the strap never twists | Two moving parts to inspect |
| Split ring directly on the strap | Minimal, nothing to fail | Strap must be unbuckled or unsewn to remove |
| Ankle / lug connectors (parallax-style) | Cleanest look, no rings | Proprietary, defeats the point of a handmade strap |
We default to swivel snap hooks: the rotating eye is exactly what our swivel vs trigger snap hook comparison recommends for anything that hangs and twists. Buy cast brass or stainless hooks — the difference between cast and cheap stamped metal is the same one we document in cast vs forged vs stamped D-rings, and stamped hooks are the ones that open under load.
Tools and materials
- One veg-tan strap from the chart, plus 60 mm of offcut for the hook tabs
- Two cast brass swivel snap hooks sized to the strap width; two brass split rings (12–15 mm) for the camera lugs
- Four double-cap rivets, 6 mm — setting process in our double-cap rivet guide; substitute copper rivets and burrs for a heavy DSLR, as in setting copper rivets by hand
- 0.8 mm waxed polyester thread and two harness needles — thread sizing in the thread guide
- Rotary punch or drive punches (2 mm and 3 mm), stitching chisels — compared in chisels vs pricking irons
- Edge beveler, gum tragacanth, wooden slicker, edge dye, cutting mat, steel ruler, wing divider
Step 1 — Cut the strap and hook tabs
Cut the main strap dead straight; any taper shows as a twist at the camera. Cut two tabs 60 mm long from the same leather. Punch a rounded tail on each tab — this is the end that feeds through the hook eye.
Step 2 — Bevel, dye and burnish every edge
Finish the edges before any assembly. Once the tabs are riveted down, a slicker cannot reach the join, and a raw edge on a neck strap sheds fibres onto clothes. The full process is in the edge burnishing guide.
Step 3 — Saddle-stitch the strap
For a neck strap that carries a kilo of glass, stitched edges beat glued ones. Mark the stitch line 3 mm from each edge with the wing divider, prick or chisel the holes, and saddle-stitch both edges — the technique is in our saddle stitching tutorial. Skive the tab ends where they fold, or the rivet stack gets too thick; how to do it without weakening the leather is covered in the skiving guide.
Step 4 — Assemble each hook end
- Feed the tab through the swivel hook's round eye and fold it back on itself 20 mm around the strap end.
- Punch two 2 mm holes through all layers, 8 mm from the fold and 12 mm apart.
- Set a rivet in each hole. Stack thickness for a folded 3 mm tab over a 3 mm strap is 6 mm — pick rivet length accordingly with the hole and hardware size chart.
- Thread the split ring onto the hook's fixed end (not the swivel eye). Twist the ring onto the camera lug with a thumbnail or a small screwdriver tip — never pry it with a knife.
- Load test: hang the camera from a door handle overnight before trusting the strap.
Step 5 — Add an optional comfort pad
For DSLR weights, stitch a padded slider to the neck section: a 90 x 50 mm piece of 2 mm leather skived at both ends, sewn into a sleeve, and threaded onto the strap before the hooks are riveted so it cannot come off. A pad doubles the contact area and makes an all-day carry genuinely comfortable.
Step 6 — Make it adjustable (optional)
For a crossbody length that needs to change with clothing, build a tri-glide adjuster: fold one strap end through a 25 mm cast slider and secure it with a rivet, exactly the system described in our rectangle and square rings guide for adjustable straps.
Troubleshooting
| Problem | Cause | Fix |
|---|---|---|
| Strap twists at the shoulder | Rigid leather, no rotation point | Swivel hook on at least one end; work the strap by rolling it |
| Hook tab creaks or shifts | Rivets too short or hole spacing too wide | Re-rivet with a longer rivet; add a third rivet in the middle |
| Neck irritation after an hour | Strap too narrow for the camera weight | Go to 25 mm and add the pad — width, not padding, does most of the work |
| Split ring scratches the lug | Ring overloaded or over-opened | Use a fresh ring; twist it on, never spread it wide |
| Strap stretches a cm or two | Chrome-tan or veg-tan cut on the stretch | Re-cut in bridle leather with the grain running along the length |
FAQ
Will a swivel hook scratch my camera?
The hook never touches the camera — the split ring does, and only at the lug where a strap would sit anyway. Brass rings are gentler than steel and match the hardware. Check the lugs' shoulder (the groove that retains the ring) is intact before hanging an expensive body.
How much weight can this strap hold?
Two riveted tabs in 3 mm veg-tan with cast hooks carry far more than any camera — the practical limit is neck comfort, not the hardware. We have load-tested the same rivet-and-fold construction to 25 kg in our strap anchor reinforcement guide.
Can I make the strap without sewing?
Yes: use a wider strap, skive the hook tabs thin, and assemble with four copper rivets instead of stitching. Riveted-only straps are period-correct for field cameras and quicker to build — the rivet process is identical to our copper rivet tutorial.
How do I care for it?
Condition twice a year, keep it out of the car's summer sun, and check the swivels and rivets whenever you change the lens — ten seconds of inspection is the whole maintenance schedule.
Conclusion
Cut straight, stitch or rivet the tabs properly, insist on cast hooks, and finish the edges before assembly — that is a strap your camera deserves. For a wrist-sized version of the same build, make the beginner leather key fob, or explore more projects in Leathercraft Guides & Tutorials.
Enjoyed this guide?
Browse more in Leathercraft Guides & Tutorials or share this article with another leather maker who'd find it useful.


