How to Make a Leather Tote Bag: Rivets, Magnetic Snap and Full Assembly
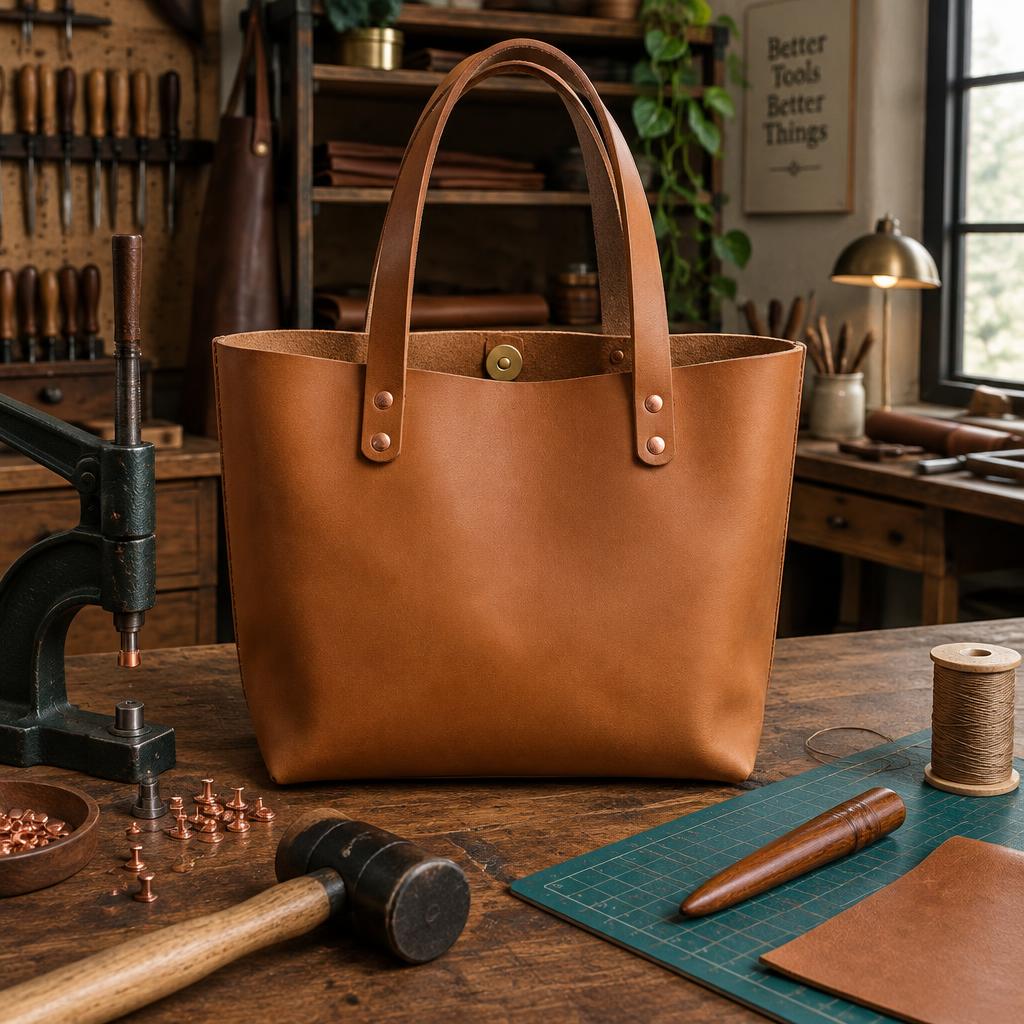
A leather tote bag is the perfect first large project: every cut is straight, the straps attach with rivets instead of complex stitching, and one magnetic snap closes the whole thing. This guide gives the complete cutting list, the assembly order that avoids the classic beginner mistakes, and the hardware decisions that separate a tote that lasts a decade from one that sheds rivets in a month.
Cutting list
Designed for a finished tote of roughly 34 cm wide x 30 cm tall x 12 cm deep, in 2.0–2.5 mm (5–6 oz) vegetable-tanned leather. Buy a hide or half-hide; a shoulder works fine and costs less.
| Piece | Quantity | Cut size (with allowance) | Thickness |
|---|---|---|---|
| Body panel (folds into front + back) | 1 | 94 x 32 cm | 2.0–2.5 mm |
| Gusset strip (folds into base + sides) | 1 | 110 x 12 cm | 2.0–2.5 mm |
| Handles | 2 | 65 x 3 cm | 2.5–3.0 mm |
| Strap anchor tabs (under-handle reinforcement) | 4 | 8 x 3 cm | 2.0 mm |
| Snap tab (top closure) | 1 | 7 x 4 cm | 2.0 mm |
Cut with a fresh blade against a steel ruler in two passes. Squares matter here more than anywhere: a 2 mm drift compounds around four corners and the gusset will not meet the body evenly.
Hardware: keep it minimal and solid
- Strap rivets: eight double-cap rivets, 6 mm, or four copper rivets and burrs for maximum strength — the trade-offs in our copper rivet tutorial and the double-cap guide. Brass or copper only; the plating on zinc rivets wears through exactly where hands grip, as explained in solid brass vs plated hardware.
- Magnetic snap: one 18 mm sew-in magnetic snap set through the snap tab and the back panel. Full installation — including reinforcing and hiding the prongs — is in our magnetic snap installation guide.
- Optional feet: four screw-back base studs protect the bottom panel — see attaching bag feet and studs.
Tools and materials
- Leather per the cutting list, plus scrap for testing rivet and snap settings
- Contact cement — types compared in our leather glue guide
- 0.6–0.8 mm waxed thread and two harness needles — sized in the thread guide
- Rivet setter and mallet (or hand press), snap-setting die, rotary punch, stitching chisels
- Edge beveler, edge dye, gum tragacanth, wooden slicker, skiving knife, cutting mat, steel ruler, wing divider
Step 1 — Prepare every piece
Bevel and burnish the top edges of the body panel and both handle edges now — after assembly these are unreachable. Skive the handle ends to 1 mm where they will fold under the anchor tabs; the skiving process without weakening the leather is in the skiving guide. Mark the fold lines of the body panel lightly with wing dividers.
Step 2 — Install the magnetic snap
Set the female half of the snap in the centre of the snap tab (reinforced with a scrap backing), and the male half on the back panel 4 cm below the top edge. Install before assembly while every panel is flat — the single most common sequencing mistake is trying to set a snap inside a finished bag. The full prong-folding and backing method is in the magnetic snap guide.
Step 3 — Assemble the body and gusset
- Glue the gusset strip around the body panel's perimeter with contact cement, folding it at the four corners. Clamp with binder clips as the solvent flashes off.
- Saddle-stitch the joint 3 mm from the edge — both needle technique and thread tension are in the saddle stitching tutorial. Stitching (not glue alone) is what carries a loaded tote around its whole perimeter.
- Trim the seam allowance evenly, bevel and burnish the exposed edge. For a faster finish, edge paint is a legitimate alternative — compared honestly in edge paint vs burnishing.
Step 4 — Attach the handles with rivets
- Position each handle end 10 cm in from the bag's side, overlapping the body's top edge by 5 cm inside.
- Place an anchor tab over the handle end so the fold is sandwiched: body, handle end, tab.
- Punch two 2 mm holes through all three layers and set rivets. This is the load path of the whole bag — a full explanation of why this junction fails and how to build it strong is in reinforcing strap anchors.
- Pull each handle hard upward, twice. Any shift means the rivets are too short or the punch slipped; redo it now, not after the first grocery run.
Step 5 — Optional lining and interior
An unlined 2 mm tote is sturdy as-is, but a lining hides rivet backs and lets you add interior pockets cleanly. The materials, assembly order (hardware first, lining last) and corner method are covered step by step in how to line a leather bag, and a zippered interior pocket pairs perfectly — see adding a zipper pocket.
Common mistakes
| Problem | Cause | Fix |
|---|---|---|
| Bag sits crooked | Gusset fold drift, uneven corner trimming | Score fold lines with dividers; trim the seam after a dry test fold |
| Handles tear loose at the rivets | No anchor tabs; rivets set in single-thickness leather | Always sandwich the handle with a tab; rivet through three layers |
| Top edge waves after a week | Top edge left unburnished and unstitched | Stitch or glue a top hem before assembly; burnish it now |
| Magnetic snap rips out | Prongs set without a backing disc | Re-set with a leather or backing washer behind the prongs |
| Seam shows glue stains | Contact cement over-applied | Thin coats on both faces, wait for full tack, then join once |
FAQ
Can I make this tote without a sewing machine?
Yes — that is the point of the design. Every structural seam here is hand saddle-stitched, which is stronger than a lockstitch machine seam because it cannot unravel; the technique is in our saddle stitching tutorial.
What leather weight is too heavy?
Above about 3 mm the gusset corners become unmanageable with hand tools and the bag weighs a kilo empty. If you love the stiff look, keep the body at 2–2.5 mm and let the structure come from correct gusset geometry.
How do I keep the bottom from sagging?
Insert a cut-to-size piece of 2 mm bookboard or thin HDPE between lining layers, and add the screw-back feet — the installation is in the bag feet guide. Together they keep the base flat for years.
Is a magnetic snap strong enough for a tote?
For a top closure on a bag that carries by handles, yes — the snap aligns the opening but the load rides on the straps. For heavier loads, add a second snap 12 cm away or step up to a turn lock, which we compare directly in magnetic closures vs turn locks.
Conclusion
Cut square, stitch the gusset, sandwich every strap end with a tab before riveting, and set the snap while the panels are still flat. Build it once and you have the template for every tote variation you will ever want. For a smaller warm-up project, make the leather card holder first, or browse all builds in Leathercraft Guides & Tutorials.
Enjoyed this guide?
Browse more in Leathercraft Guides & Tutorials or share this article with another leather maker who'd find it useful.


